Showing posts with label Decorating Diva. Show all posts

Thursday, January 9, 2014

Just another reason I LOVE paint - Stair Rail Update


If you have read my blog for any period of time or followed me on Instagram, then you know that I love, love, LOVE me some paint!

After we removed the carpet from the Stairs, sanded and stained them, painted the stairwell, added Chevron, and added the mirros, it STILL felt like it was missing something.  (Click on the links to check out previous DIY projects on a budget)

SO... I pulled out a can of paint... AGAIN! Go Figure!

I used the flat black paint that I used on my Front Door and I think it turned out perfectly!  It saved me a fortune on updating the rails and it was done in a matter of minutes.  Nothing better than that!


 OH how I LOVE the power of paint!


Pin It

Saturday, January 4, 2014

Family Recipes in the Home

We received a handwritten recipe from my Husband's Nanny after she passed away and I wanted to make sure that I displayed it and didn't just throw it in a drawer.  

After redoing our dining room this year, I though framing her recipe and displaying it in there was perfect!


It's so very simple, but exactly what I had in mind!  Don't throw handwritten letters or recipes in junk drawers, display them in beautiful frames and add a touch of family throughout different rooms in your home.


Pin It

Thursday, October 31, 2013

Dining Room Do-Over


While I've taken a break from Blogging, I haven't taken a break from getting crafty at home.  My latest project is my Dining Room Do-Over.  I'm slightly (Okay, VERY) obsessed with completing projects with a minimal budget to prove that design doesn't have to cost a fortune!
Although I LOVE red, I'm always drawn to blues (I'm pretty sure it's my power color) and have very little blue in my home.  That is about to change...

I gave myself a $250 budget and recruited a SMOKIN' HOT handyman.
Here is my BOOOOORING dining room before

I can do ANYTHING with a can of spray paint!  Seriously powerful stuff!

I started by priming and spraying painting the china cabinet that was already in the dining room.  After the paint dried, I used a dry brush and an antique glaze.  I also sprayed the hardware with my favorite hammered spray paint and I just LOVE the way the piece turned out!

 While I was spraying my life away, my Smokin' Hot Handyman was painting the dining room walls the most beautiful teal color.  Honestly, it is STUNNING! 
Paint Color: Glidden Totally Teal

Now, I have used MANY paint brands and I must say that Glidden Paint and Primer in One is by far the BEST paint I have EVER used... Hands Down!


While Mr. Smokin' Hot Handyman painted the room, I sprayed the other pieces a cooridinating color.
 
I also sprayed the chandelier and added some of the antique glaze.  I sprayed the shades as well... See, I can do ANYTHING with spray paint!
I purchased a new rug, mirror, decorative plates, flowers, and decorative tray.

I added a few pieces that I already had around the house.

And Wah-Lah!

This project came in just slightly under the $250 budget with paint, spray paint, brushes and decorative pieces.  I will added a few more pieces soon, but that's how design works... always evolving! 


**UPDATE** I am slowly adding touches throughout our new dining room, including a monogrammed burlap runner, family photos and the cutest little hooter!
 

Pin It

Monday, September 16, 2013

Weekend Wrap Up

WHAT A WEEKEND!!!

Life has been CRAZY, but I'm finally back with a weekend wrap up!

Started Friday with Margarita Mania with my boys... We do this every Friday and we love it!


I also found out that I'm going to be an Auntie to another sweet baby boy!!!  I cannot wait to love on him!

Over the last 2 weeks, I've been doing Sarah Jenks' Live More Weigh Less Challenge and I am LOVING it!

The challenge is forcing me to think outside of the box, have fun and work on being comfortable in my own skin.

One of the challenges inspired me to go through my closet and buy a new pair of jeans, jeans that are THREE sizes smaller than those in my closet and THEY FIT!


One challenge required wearing red lipstick and I ROCKED IT!


Having FUN is crucial to feeling good in your body and I'm learning that every single day!

Over the weekend, I achieved a HUGE weightloss goal and it brought tears to my eyes.  I have struggled with weight my entire life, so when I see progress I'm a little proud of myself.


Crazy things happened over the weekend DIY Style, so check back this week to see what we did!


Have a great week!


Pin It

Friday, May 3, 2013

Chevron Crazy

I'm still decorating, crafting and creating and I love it!

Chevron is sweeping the nation and showing up any and everywhere possible.  My home is no exception!


Here is a recent transformation we did in the house. 


Wahlah!

Pin It

Monday, October 25, 2010

Stairway to Heaven AKA The Project of the Century


After 3 months of VERY hard work on the weekends, our "Project of the Century" is FINALLY complete!

I am not sure I'd take on a project this big again; however, the result of all of our blood, sweat, tears and frustration was absolutely worth it! Not to mention, after being quoted $150 per STAIR (I have 17) to remove the carpet and install wood, I knew that I would be forced to tackle this project... just me and the Hubby. This project cost us a TOTAL of $125... SCORE!!

There are a FEW blogs out there with a step-by-step guide on how this is done (I wish I had found them prior to starting this project) and I thought I'd share one that was posted very recently.
http://www.centsationalgirl.com/2010/10/finished-staircase/
Now... Here's a few before and afters
Before
Don't judge! We think it's as disgusting as you do and that is why we HAD to do something!


Removal of the Carpet (The easiest part)... After we removed the carpet we looked at each other and wondered what we had done.

Wah-Lah! I am in LOVE!
Do these look like $125 stairs to you?! I'm sure if we paid the Professionals $150 a stair, they wouldn't have the slight imperfections that I am loving!

We WILL be staining the handrails... Hope the Hubby is ready for another project. ;-)
And a little bit of Halloween Fun!
**I will warn you that if you tackle this project, it will be extremely frustrating throughout the process. However, the results are more than worth it. We sanded each step prior to staining (what a process) and continue to find dust in places we'd rather not. ;-)
Now... onto the next project.
*Tiffany
Pin It

Monday, September 13, 2010

Wonderfully Wordy

I'm always looking great ideas to share with you & I just LOVE this one! I am a HUGE fan of vinyl lettering and have had it in my home for years; therefore, I am thrilled that it has caught on & stuck in the home decorator world.


I am LOVE, LOVIN' the way Wonderfully Wordy has decorated her pantry door!
Pin It

Sunday, July 11, 2010

From Dining to Drapes

Are you looking for an easy DIY project?!

I have JUST the one for you to try!
From Dining to Drapes

Here's what you'll need:

* Table Cloth
* Heat n Bond or Stitch Witchery
(I've tried both and do not prefer one over the other)

* Iron


I found this tablecloth at Target on the Clearnace rack for $11.47!! I'll let you figure out the "with tax" total. Either way, I SCORED & it's in the colors that I'm needing for the guest room makeover!


Cut the tablecloth into panels that will fit the dimensions you need. I purchased a tablecloth that is 60" x 84", so I had one simple cut up the middle.

Fold over a portion of the panel to create a curtain rod pocket. Place the fusible web between the fabric and follow the package directions. Typically, you will place the fusible web between the fabric layers and cover with a damp cloth. Set iron on "wool" settings and press for about 20 seconds.

Repeat on the second panel.

Let the panels cool down, hang and Viola!


*Tiffany
Pin It

Wednesday, April 14, 2010

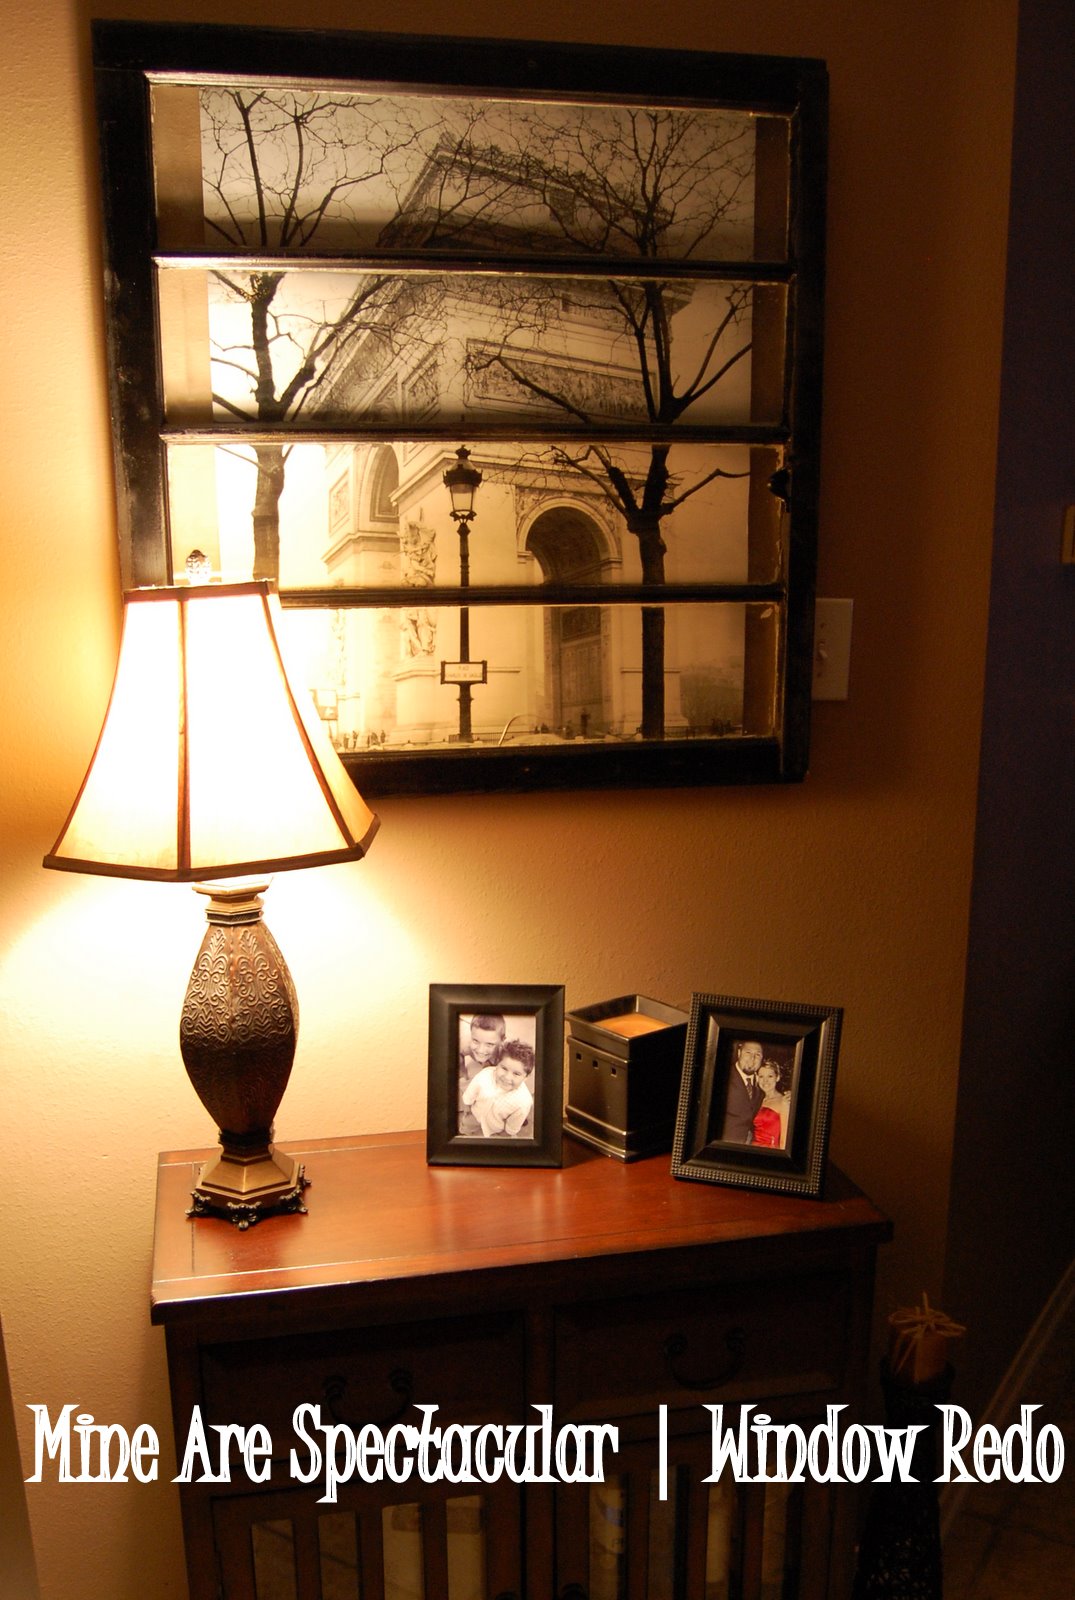
Window Redo - Trash to Treasure


What's more fun than taking something from Trash-to-Treasure?

Spending less than $15 to make it SPECTACULAR!

A girlfriend of mine was getting rid of this antique window and I just knew that I could figure out something to do with it. I've spent the last few months trying to decide how I wanted to display it. Well... I FINALLY decided!

Here's what you need:

Paint & a Poster to match your home decor (Yep, that's it!). OH, and the window of course.
Or... use the window to frame family photos.

Before


Slightly Sanded and Painted Black

I sanded the window frame slightly, because I still wanted the window to have an aged look even after I painted it. Once the paint dried, I went back and sanded the edges a bit to look a bit more weathered.


While the window is drying, cut the poster that you chose into the same size as the window panes and attached them from behind with an adhesive (I used a heavy duty tape).

And there you have it... A Window Redo!!


I happen to absolutely LOVE this project!!

I still have another antique window, but I have a different idea that I want to try.

Stay Tuned...
Showing some Linky Love... For more ideas, visit these blogs!

Making

Keeping It Simple


Photobucket


Pin It

Wednesday, March 24, 2010

Wordless Wednesday

I want to paint this wall, but I LOVE my words and I want save them.

I have an idea... Stay tuned!

Pin It

Monday, March 22, 2010

Who Knew What a Can of Paint Could Do?

I know what one can of paint can do & yet I am ALWAYS amazed!
Lil Man's bathroom had plain white walls (UGH) and he wanted "REALLY green walls". So, we found a color that we all liked and I think it came out perfectly!
This may be my new favorite green... I just LOVE it!
Another view
Hope you are ignoring the finger prints... I can't be perfect! ;-)
A coat of paint is EXACTLY what this bathroom needed!

We have been painting machines!
Keep checking back for more Mini-Makeovers!
*Tiffany
Pin It